Transferring and starting a visualization project
INFORMATION

We recommend setting up an autostart to ensure that the Visualization is automatically available on the Windows part of the MOVI-C® CONTROLLER during system startup. For further information, refer to chapter Setting up autostart.
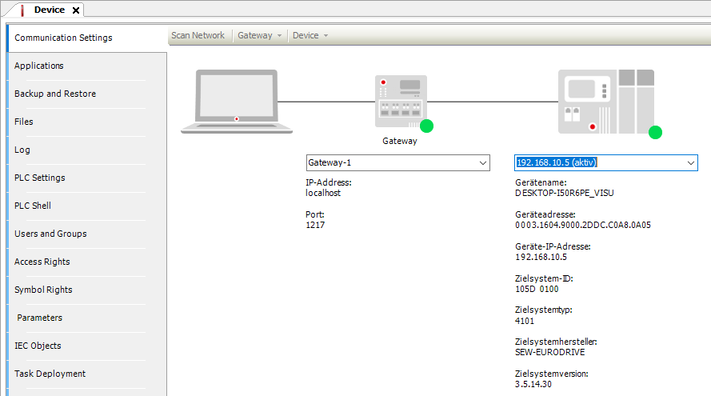
To start the visualization project, it must first be transferred to the Windows part of the MOVI-C® CONTROLLER. The prerequisite for this that the Visualization installed on the Windows part of the MOVI-C® CONTROLLER has been started (see green status display in the configuration of the visualization).
Proceed as follows:
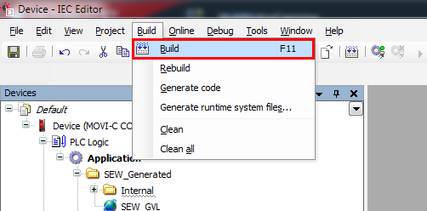
- Open the [Build] menu and select [Build]. You can also start the process using the key shortcut <F11>.
- The result of the build is displayed.
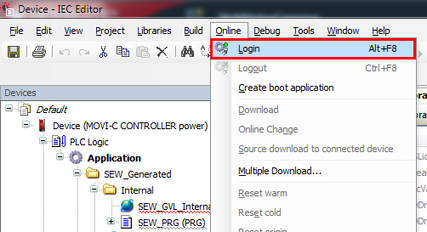
- Open the [Online] menu and click [Login]. You can also log in with the key shortcut <Alt> + <F8>.
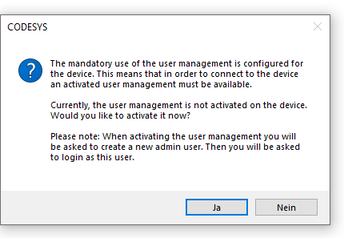
- A dialog box opens asking whether you want to activate device user management.
- Confirm the dialog by clicking [Yes].
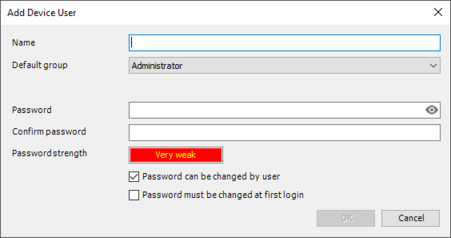
- The "Add device user" dialog opens.
- Create a device user to be able to edit the user management as this user. In this case, only the administrator group is available. Define a "Name" and "Password" for the user. The password strength is displayed. Also observe the set options for changing the password. By default, the user can change the password at any time.
- Confirm your selection with [OK].
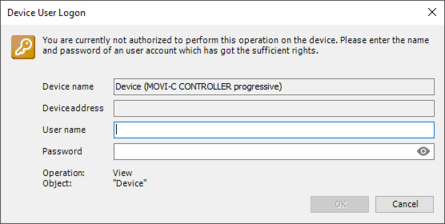
- The "Device user logon" dialog box appears.
- Enter the login data of the user you have just created and confirm your entry with [OK].
- The created user is logged in. The user name is displayed in the taskbar.
- The IEC Editor performs the login to the MOVI‑C® CONTROLLER.
- A dialog box appears asking whether the program is to be downloaded.
- Confirm the prompt with [Yes].
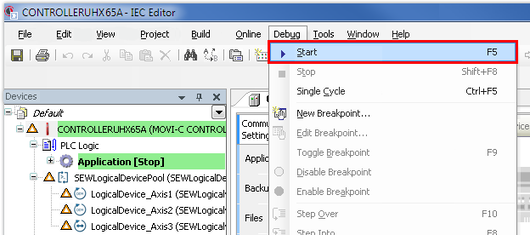
- Open the [Debug] menu and select [Start]. You can also start the process using the key shortcut <F5>.
- The IEC program on the MOVI‑C® CONTROLLER starts.
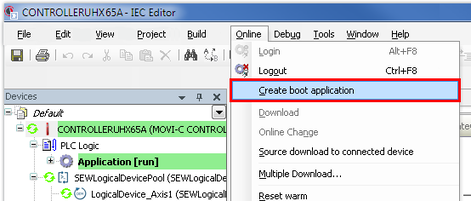
- Open the [Online] menu and select [Create boot application].
- The boot application is saved on the MOVI-C® CONTROLLER.
- The fault-free boot application is switched to "Run" state after having activated the MOVI‑C® CONTROLLER.
INFORMATION
If an error is indicated, double-click the error message to navigate to the error. Eliminate the error and compile (build) the project again.
INFORMATION
User management must be set up as of MOVISUITE® V2.30 – CODESYS V3.5.17 in order to connect to the device. When you log on to the device for the first time, a corresponding message is displayed in the IEC Editor.
INFORMATION
The user name and the associated password are mandatory for all further work with the device. Therefore, make sure that you do not forget these user data. For more detailed information on user management, refer to chapter Additional instructions.
INFORMATION
A boot application must be created so that the visualization project will be restarted automatically after the MOVI-C® CONTROLLER is switched off and on.
INFORMATION
