Configuring the master
Do the following to configure the SBusPLUS master:
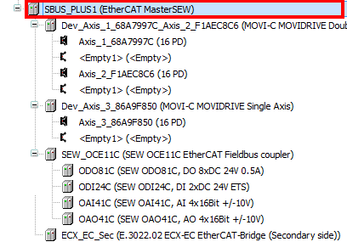
- In the IEC Editor, double-click the device node of the SBusPLUS master.
- The window for configuring the master opens.
To make general settings for the master, choose [General] from the menu.

No. | Description |
|---|---|
[1] | The check box must always be enabled. Slave addresses cannot be set manually. |
[2] | This section contains preconfigured settings for the EtherCAT® network. Do not make any changes to these settings. |
[3] | In this drop-down list, you set the cycle time of the EtherCAT® frame. The cycle time is a whole-numbered multiple of 1 ms and has to be equal to the associated IEC bus cycle task. |
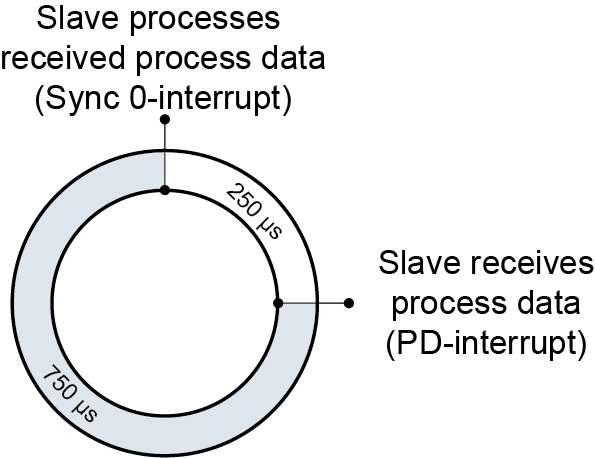
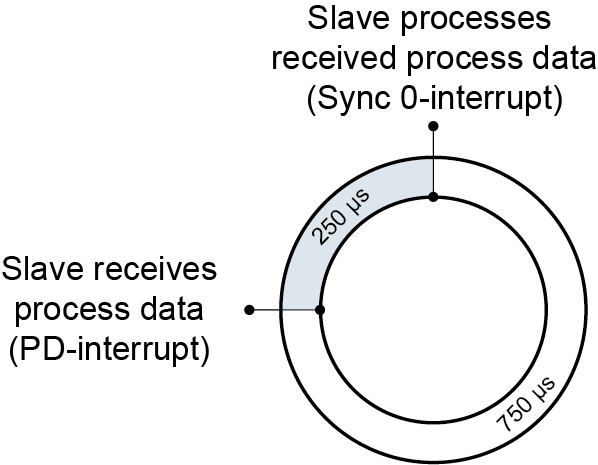
[4] | In the "Sync Offset" choice box, you can set the time difference between the receipt of process data of the EtherCAT® in the slave and the processing of process data. The "Sync Offset" compensates the time differences when the frame receives the process data and results in slight clock variations. The sync offset is indicated in percent and refers to the set cycle time. Examples:
INFORMATION! A negative sync offset near the "Sync0-interrupt" will cause an error in process data processing. Bear in mind the runtime of EtherCAT® frames for your calculations. |
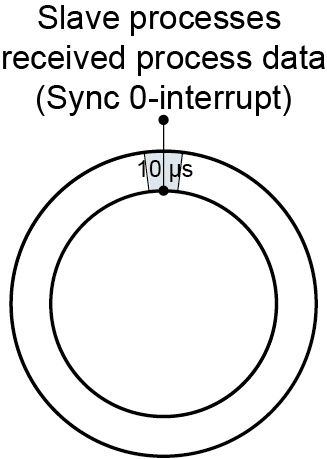
[5] | When the check box is enabled, the clock variations in the slaves are monitored when the process data of the EtherCAT® frames are processed. "Sync Window" refers to the set cycle time of the master. The default value for "Sync Window" is 10 μs based on a cycle time of 1 ms. Example:
INFORMATION! Booting of the network takes longer when setting "Sync Window" to smaller values. |
[6] | When the check box is enabled, the LRW command will be used. This setting reduces the assigned process data length. Some slaves do not support LRW commands but only LWR/LRD commands. Disable the check box in this case. Refer to the ESI file for information whether a slave supports the LRW command or not. |
[7] | When the check box is enabled, the master attempts to switch failed slaves in the system to "operational" ESM state. When the check box is disabled, the slaves remain in the following ESM state after failure:
|