Creating a watch table
Watch tables allow for monitoring and controlling the process data exchange.
Proceed as follows:
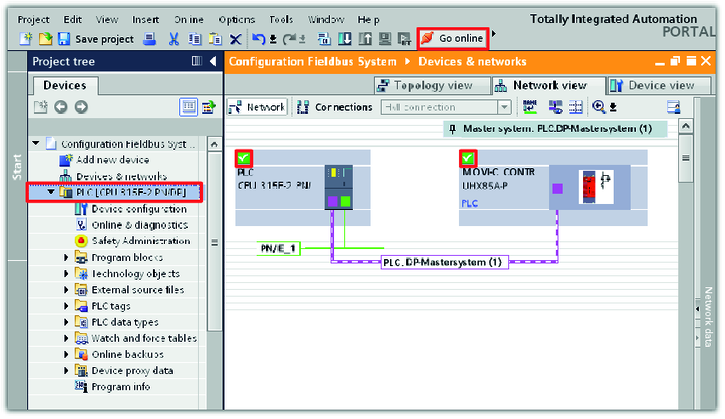
- Switch to the TIA portal.
- Establish an online connection between the PLC and the MOVI‑C® CONTROLLER. Click on the "Go online" icon.
- In the network view and device view, all addressed stations are shown with a green check mark.
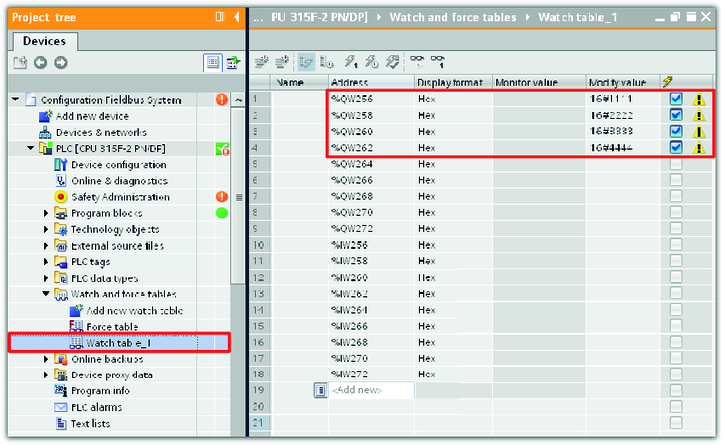
- Add a new watch table in the "Watch and force tables" subfolder of the PLC.
- Enter the addresses of the process data words in the "address" column. The input and output addresses define which process data word is used to address a station. Make sure that the process data words are in the address range of the stations and that the address ranges for input and output process data words are identical.
- Enter test values for some process output data words in the "Modify value" column. The values are sent to the MOVI‑C® CONTROLLER if communication has been established successfully.
- In this example, test values are entered for the first 4 process output data words.
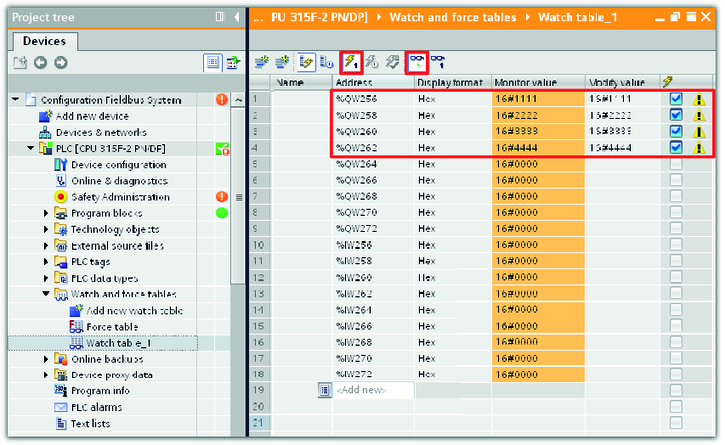
- Click the respective icons in the toolbar to first start variable monitoring (glasses icon) and then to control the active variables (flash icon).
- The set test values of the process output data words are transferred to the "Monitor value" column. The PLC sent the process output data words to the MOVI‑C® CONTROLLER.
- Switch to the IEC editor.
- Check if the values of the process input data words of the MOVI‑C® CONTROLLER are identical to the sent test values.
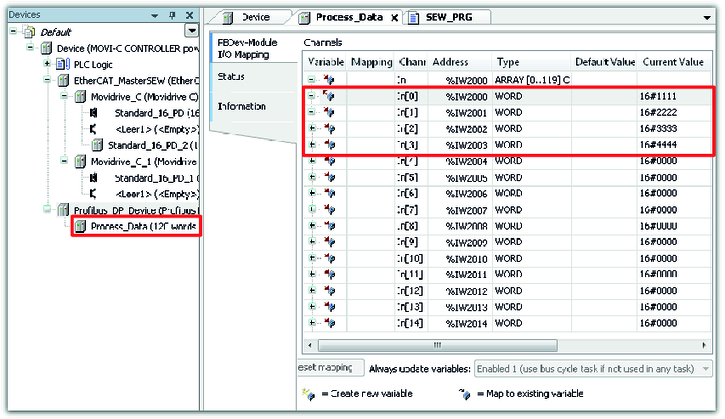
- If the test values sent by the PLC arrived at the MOVI‑C® CONTROLLER, the communication has been established successfully.
