Onboarding
INFORMATION

The menu item is only displayed if you have the appropriate permissions. For more information on permissions, refer to chapter Roles concept and authorization concept.
Creation dialog for adding a new instance.
Proceed as follows:
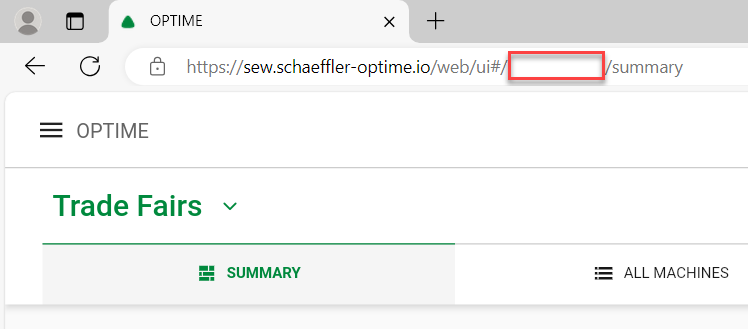
- You have determined your Schaeffler OPTIME Organization ID. For more information, refer to chapter Determining the Schaeffler OPTIME Organization ID.
- Open the creation dialog by clicking the Onboarding menu item.
- Select the region responsible for the instance. To centrally manage multiple instances in different regions, you can subsequently assign the instances to a group. For more information, refer to chapter Instance groups.
- Click the [BROWSE...] button and select a logo. Adjust the image section and the alignment. Click the [CONFIRM] button to upload the logo.
- Name the instance.
- Enter your SEW customer ID.
- Enter the address of the instance.
- Click the [ADD] button and enter the name, e-mail address, and telephone number of a contact person.
- Specify the maximum number of sensors.
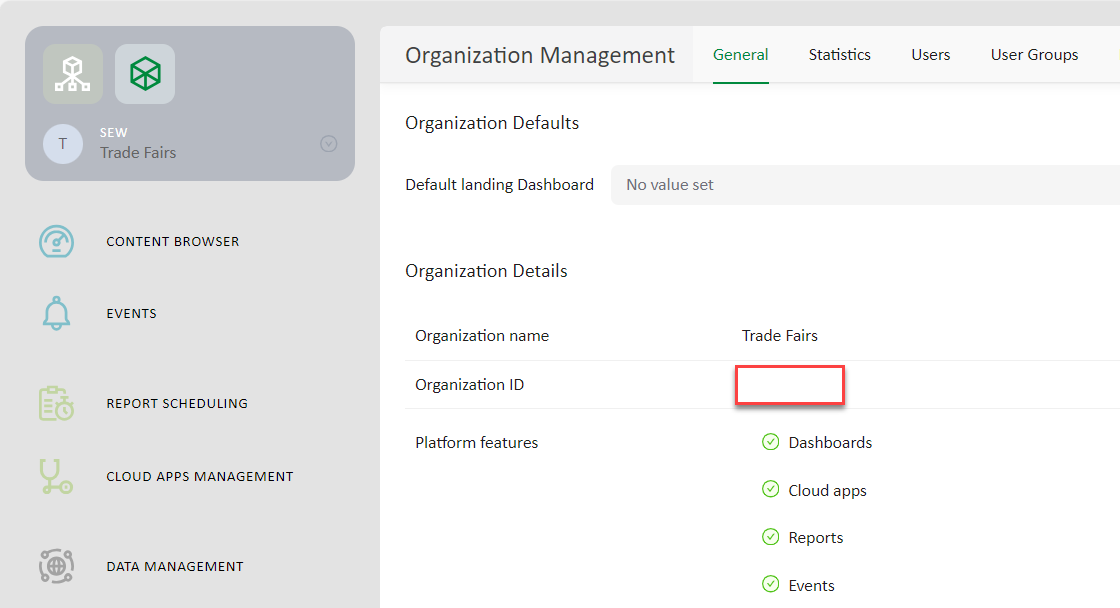
- Enter the Schaeffler OPTIME Organization ID.
- Optionally, click the [TEST] button to check whether the Schaeffler OPTIME Organization ID can be used to establish a connection to Schaeffler.
- To save the settings, click the [SAVE] button.
- You are redirected to the home page.
- Synchronization of the sensor data starts. Depending on the scope of the installation, this step can take several hours.
- After synchronization is complete, the instance displays on the home page.
Additional information