Visualizing data
The data recorded via the software module can be visualized using MOVIKIT® Web Visualization. To do so, proceed as follows:
INFORMATION

For more detailed information on how to use MOVIKIT® Web Visualization, refer to the corresponding documentation.
- Startup of the software module has been performed.
- Licensing for MOVIKIT® Web Visualization has been performed.
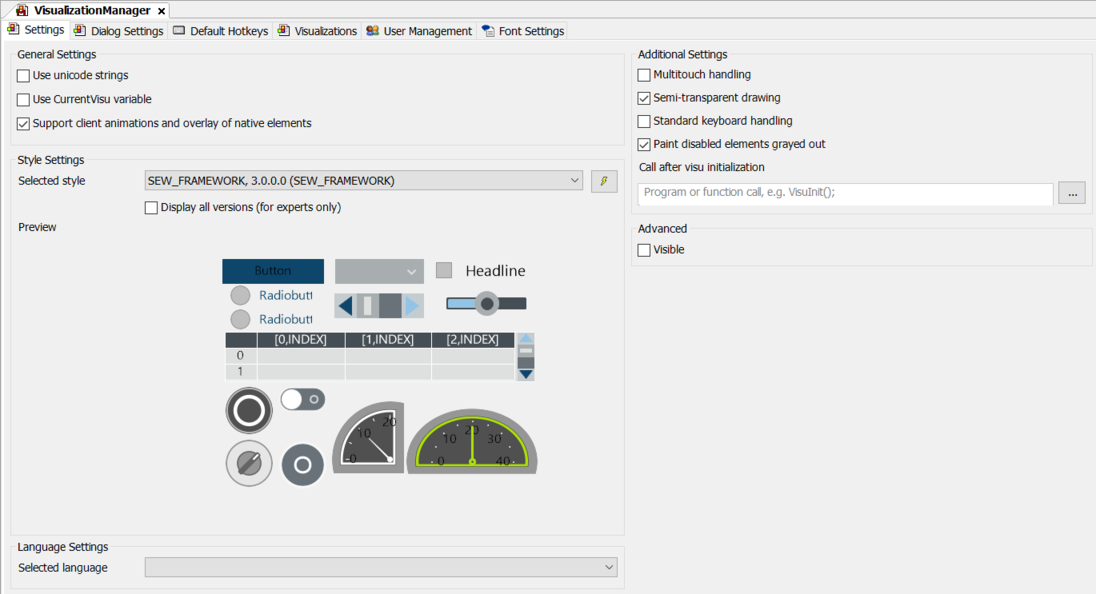
- Add a Visualization Manager element to the open IEC project. If the IEC project already contains a Visualization Manager element, check whether the settings of the Visualization Manager element described below match and add the new WebVisu element below the existing Visualization Manager element, if necessary.
- In the configuration of the Visualization Manager, select the entry "SEW_FRAMEWORK, 3.0.0.0 (SEW_FRAMEWORK)" from the "Selected Style" drop-down list in the "Style Configuration" area.
- In the "General Settings" area, select the "Support client animations and overlay of native elements" check box, and in the "Additional Settings" area, activate the "Semi-transparent drawing" check box and the "Standard keyboard handling" check box.
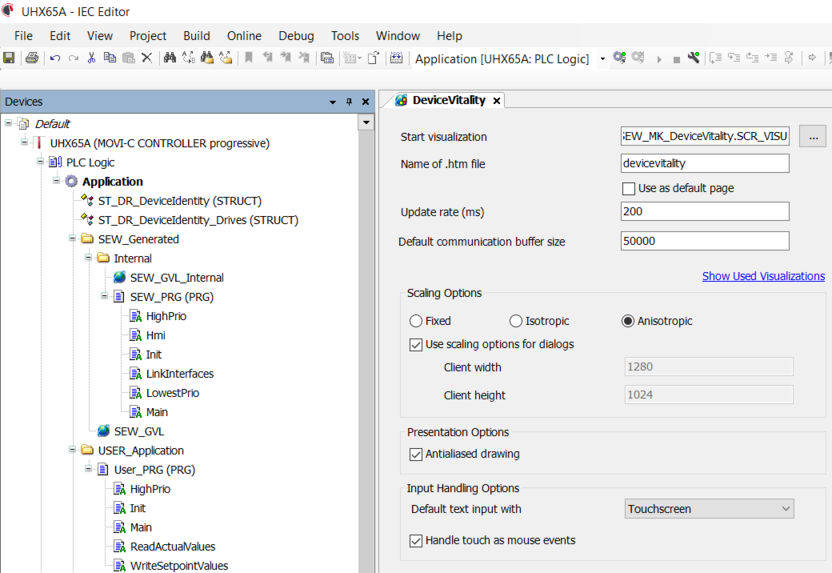
- Add a WebVisu element to the Visualization Manager.
- The configuration of the WebVisu element is displayed.
- In the configuration of WebVisu, select the "SCR_VISU" visualization contained in the "SEW MOVIKIT DeviceVitality" library as the "Start visualization".
- Enter the value "deviceidentity" as the "Name of the .htm file".
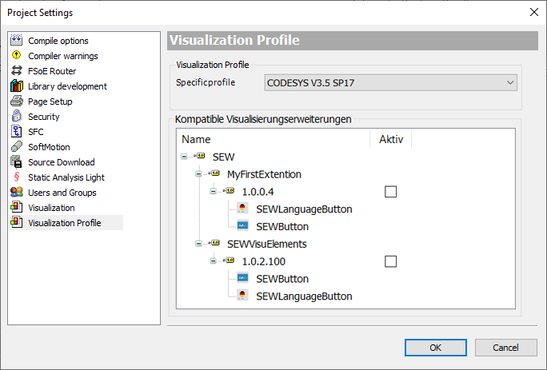
- Click [Project] > [Project Settings] in the menu bar.
- The "Project Settings" dialog box appears.
- Click the "Visualization Profile" submenu.
- In the "Visualization Profile" section, select the entry "CODESYS V3.5 SP17" in the "Specific Profile" drop-down list.
- Click [OK] to confirm your selection.
- Perform startup of the MOVIKIT® Web Visualization as described in the corresponding manual.
- In the device tree in the task configuration, open the context menu of the task "TaskHmi" and click [Add object] > [Program call...].
- The "Add program call" dialog box is displayed.
- Click […] in the field "POU for call".
- In the "SEW_MK_DeviceVitality" library, navigate to the "DriveRadar_HMI" > "SYSTEM_LIB" > "FRAMEWORK" folder, select the "PRG_HMI_FW_VITALITY" program and click [OK].
- In the "Add program call" dialog box, click [Add].
- Transfer the IEC project to the MOVI-C® CONTROLLER.
- Start the IEC project on the MOVI-C® CONTROLLER.
- The visualization can be accessed at the following URL:
http://<IP address of MOVI-C® CONTROLLER>:8080/<Name of .htm file>.html


