Fastening the DCA63.. and DCA80.. motor
Observe the following information when fastening the screws on the motor:
- When fastening, use only the bores on the output end of the motor housing.
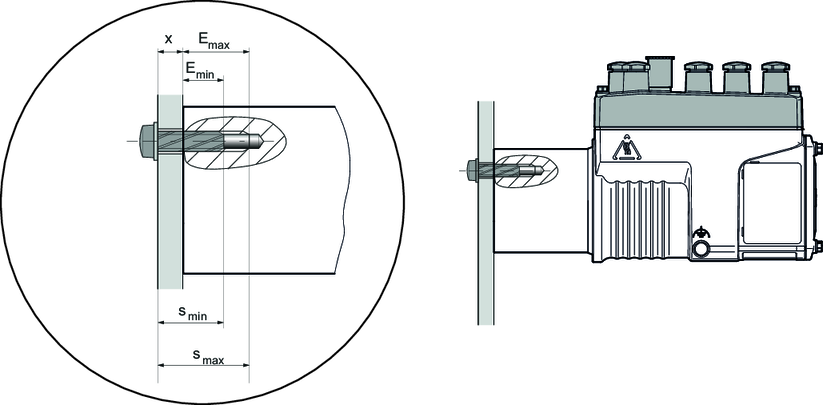
- To that end, transfer the bores required for the centering collar of the motor and the pitch circle of the mounting bores onto the mounting plate and drill (see following drawing).
- Secure the drives to a flat surface by using at least 4 screws.
- Use self-tapping screws according to DIN 7500 for fastening. SEW-EURODRIVE recommends screw connections consisting of Taptite 2000® screws.
- Of the 3 available hole circles, choose the one with the largest diameter whenever possible.
- If you undo and reconnect the screw connection, you can also use metric screws. In this case, SEW-EURODRIVE recommends using threadlocker.
- Self-tapping screws can be screwed in again after being undone. To do so, turn the self-tapping screw contrary of the direction of rotation until the thread sets into place. Then manually screw in the self-tapping screw one turn. Then tighten the self-tapping screw using the specified torque. Impulse screwdrivers or impact screwdrivers must not be used. Manual handheld screwdrivers are only permitted in service cases.
- Adhere to the recommended tightening torques of the retaining screws according to the tables in chapter Determining the screw length.
The following figure shows the bores for self-tapping screws according to DIN 7500 on drive DCA63.. SEW-EURODRIVE recommends using TAPTITE 2000® screws.
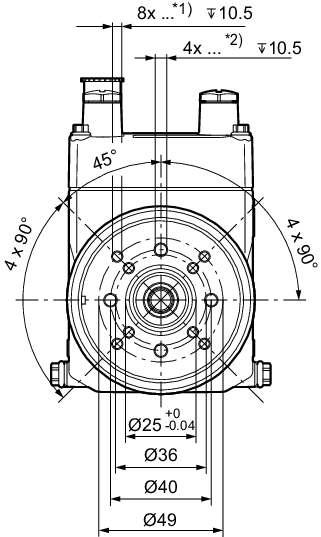
*1) | Bore for self-tapping screws in accordance with DIN 7500/size M4 |
*2) | Bore for self-tapping screws in accordance with DIN 7500/size M5 |
The following figure shows the bores for self-tapping screws according to DIN 7500 on drive DCA80... SEW-EURODRIVE recommends using TAPTITE 2000® screws.
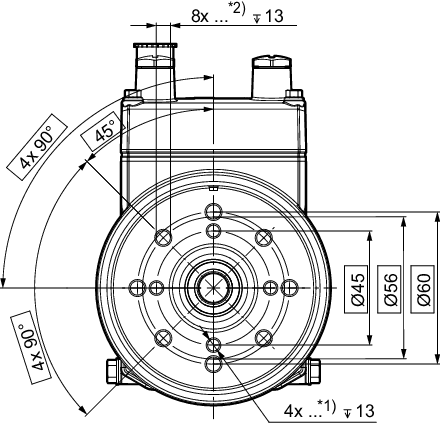
*1) | Bore for self-tapping screws in accordance with DIN 7500/size M5 |
*2) | Bore for self-tapping screws in accordance with DIN 7500/size M6 |
Additional information