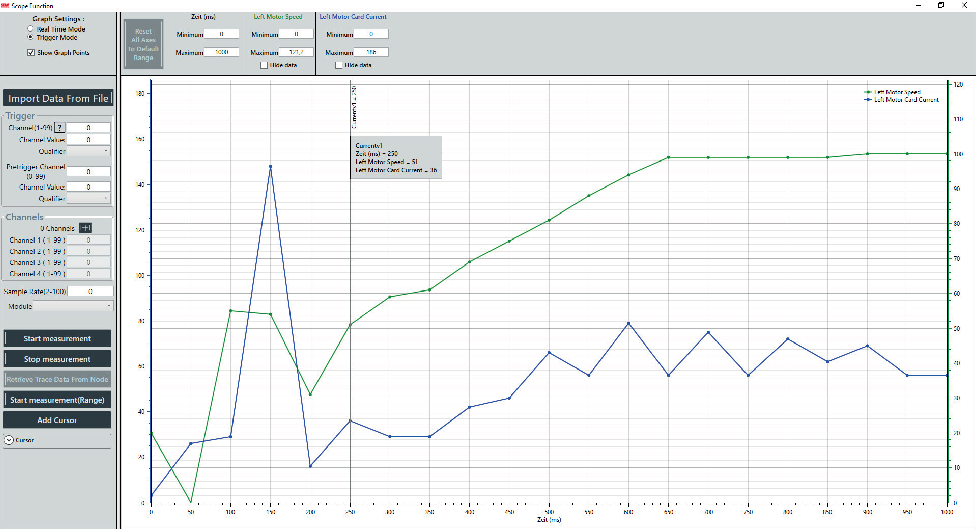
Trigger mode

[1] | Trigger |
[2] | Channel selection |
[3] | Add measuring channel |
[4] | Sample rate |
[5] | Module selection |
[6] | Start measurement |
[7] | Stop measurement |
[8] | Load recording |
[9] | Add measuring cursor |
Configuring and starting scope recording
Proceed as follows to configure and start the scope recording:
- Select the module for the scope recording.
- Select trigger.
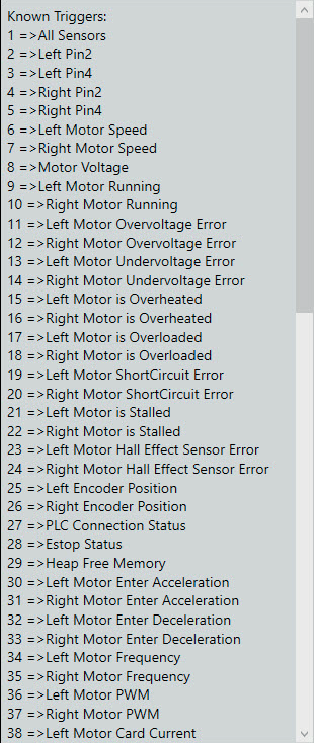
Moving the mouse pointer over the question mark displays an assignment list of the selectable channels. The corresponding number must be entered in the edit box.
The assignment list is valid for trigger selection and channel selection. - Configure the recording channels.
Click the [+] button to add a recording channel.
In the corresponding channel number, enter the quantity to be measured. - Define the sampling rate and enter the value in the corresponding field.
- Click the [Start measurement] button.
- The measurement is started.
As soon as the recording is complete, a message appears in the information field.
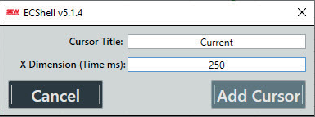
Adding a measuring cursor
Proceed as follows to insert a measuring cursor in the trace:
- Click the [Add cursor] button.
- A new dialog opens.
- Enter the title of the measuring cursor and the start point in the corresponding fields.
- Click the [Add cursor] button.
- The new measuring cursor can be moved by clicking and mouseover.
- If the mouse pointer is on the cursor, an information field is opened by clicking the right mouse button.
This information field displays relevant data such as the Y value.