Adding a library container
To add a library container, proceed as follows:
- Open the "Library" tab.
- Click [+ Add].
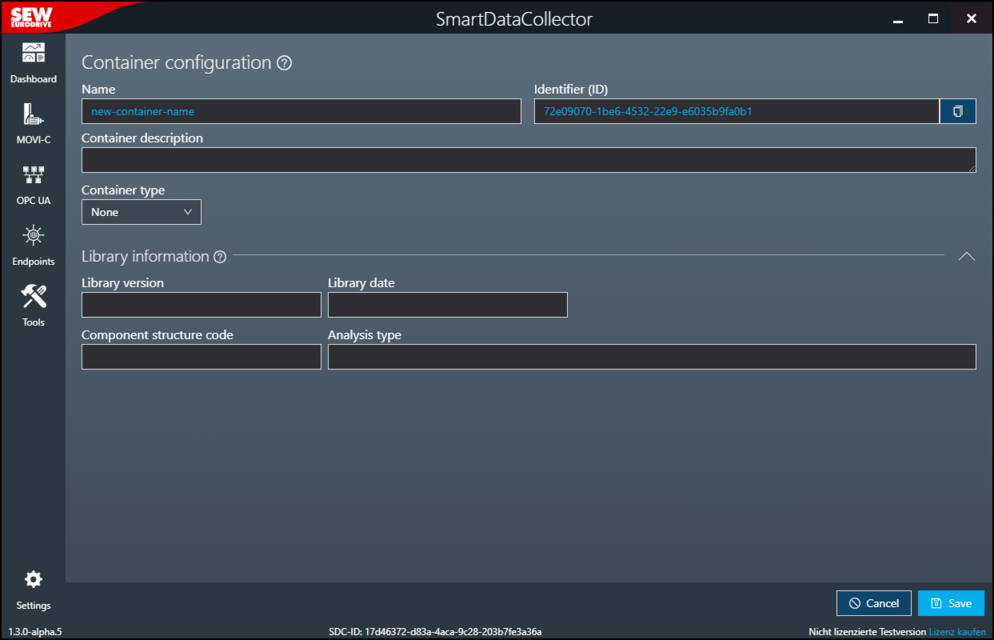
- The "Container configuration" dialog window appears.
- The library container can be configured via the following setting fields:
Setting field | Description |
|---|---|
Name | Enter a name for the container. The name is used in the tool configuration process and in the file structure when storing the JSON files. |
Identifier (this is generated) | Unique identifier of the container that is generated automatically by the software and used internally for further processing. This identifier forms part of the name of the target directory on the associated endpoint. |
Container description | Add optional description text. The description text is displayed under the "Containers" tab. |
Container type | Select the container type. For a parameter container, select the "Parameter" value. The relevant fields for the parameter container are then displayed in the dialog window. |
Library information | |
Library version | Assign a version number to the library container. |
Library date | Enter the creation date of the library container. |
Component structure code | Assign the library container to a device type using the component structure code. |
Analysis type | Specify the analysis method to be applied to the received data in the IoT Suite. |
Additional settings for the "Parameter" container type
Setting field | Description |
|---|---|
Entered parameters (NOTE: To save data, make sure that a parameter is not added to more than one container) | |
[+ Add one] button | Add one parameter for data recording. |
[+ Add multiple] button | Add multiple parameters simultaneously for data recording. |
Function in the [Import parameters from JSON file] submenu | Add parameters for data acquisition by importing a JSON or a CSV file exported from Excel, for example. See also Parameters. |
Function in the [Export parameters to JSON file] submenu | Export the currently created parameter list for data acquisition as a JSON file. See also Parameters. |
Function in the [Import parameters from library] submenu | Import parameters for data acquisition from a library container. Changes in the library container are not automatically applied to the container. |
Additional settings for the "Scope" container type
Setting field | Description |
|---|---|
Scope configuration | |
[Import] button | Import a complete scope configuration from a MOVISUITE® MES or an XML file or from a switched-on device. For further information, refer to chapter Scope configuration. |
Sample rate | Specify the time interval between successive data samples. |
Post-trigger recording | Specify the percentage of the available recording buffer that should be filled with pre-recorded samples when the scope is triggered. |
Application index | Set the operating mode of the scope recorder.
|
Memory optimization | Activate or deactivate optimization of memory usage. |
Limitation of data points | Specify whether the number of data points should be limited. If you select "No limit", the scope cache is written completely. If you select "Strict limit", the "Maximum number of measuring points" field and the [Calculator] tool are displayed and the scope cache is only partially written according to the specified number. |
Maximum number of measuring points INFORMATION: Only visible if the "Strict limit" option is selected for "Limit data points". | Specify the maximum number of measuring points. A "calculator" is available for calculating the optimum value for the recording time or the maximum number of data points. |
[Calculator] button INFORMATION: Only visible if the "Strict limit" option is selected for "Limit data points". | Calculate the optimum value for the recording time or the maximum number of data points. For further information, refer to chapter Calculator. |
Recording time (estimate) | Generated estimate of the minimum recording time in milliseconds, in accordance with the configuration above. |
Recording channels (NOTE: To save data, do not add a scope channel to more than one container) | |
[+ Add one] button | Open the "Channel" dialog window to configure and add a scope channel. In the "Channel" dialog window, set the scope channel by specifying the index, subindex, name, and channel offset, or by selecting an entry from the "Available channels" list. By activating the "Only supported" check box, only parameters that can be used as a channel for a scope recording are displayed in the "Available channels" list. The added channels can then be re-sorted in the list of recording channels using the corresponding buttons. |
Function in the [Import scope channels from JSON file] submenu | Add scope channels by importing a JSON file or a CSV file exported from Excel, for example. |
Function in the [Export scope channels to JSON file] submenu | Export the currently created scope channels as a JSON file. |
Function in the [Import channels from library] submenu | Import scope channels for data acquisition from a library container. Changes in the library container are automatically applied to the container. |
Trigger settings | |
Delay mode for the trigger | Set the delay for a configured trigger.
|
Delay time for the trigger | Set the delay for the configured trigger. |
Activate trigger #1-#3 | Activate the desired number of triggers and use the choice boxes that appear to specify the channel name and the trigger type. Decimal and hexadecimal values can also be entered in the "Compare value" edit box. Hexadecimal values require the prefix "0x". |
Linking triggers | Connect multiple scope triggers to one another by using Boolean operators. |
Metadata | |
Advanced information about the container | Displays the scope hash |
[Calculate] button | Calculate the scope hash according to the settings made. |
