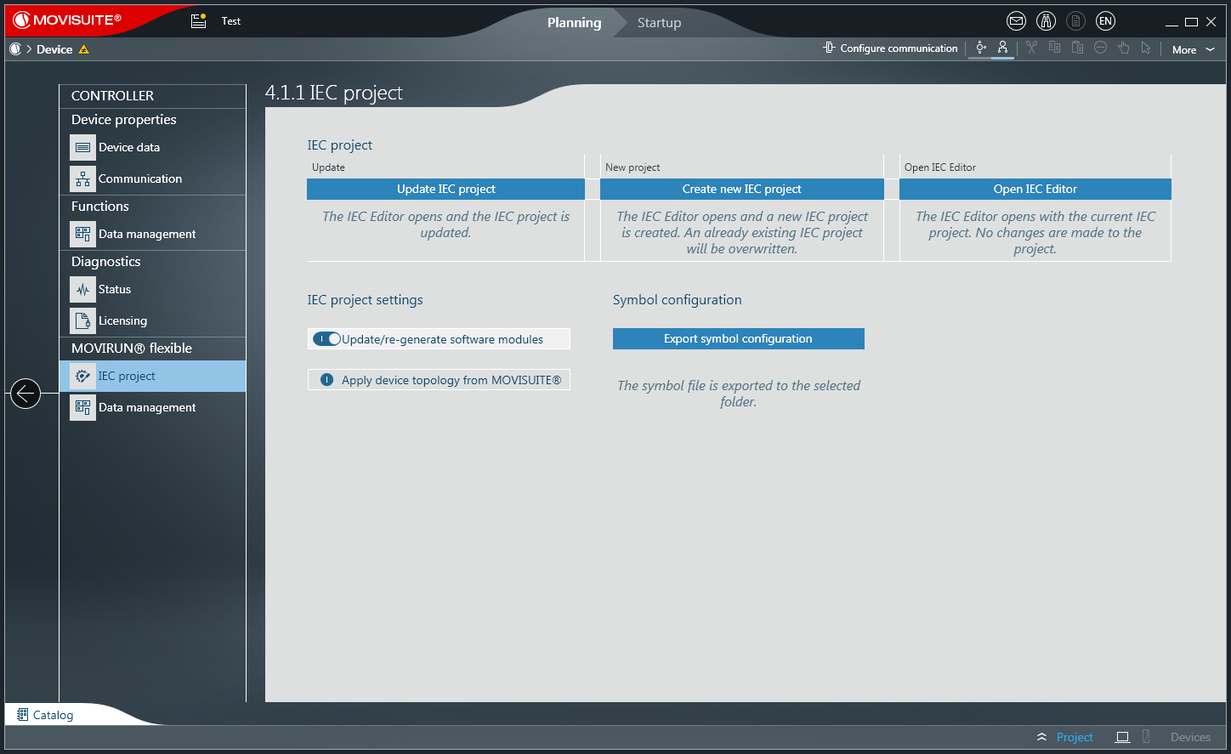
Generating an IEC project
Carry out the following steps to create an IEC project by means of automatic code generation and based on the configurations made in MOVISUITE®.
- Configuration of the software module in MOVISUITE® is complete.
- In the function view of MOVISUITE®, click the software module section of the MOVI‑C® CONTROLLER node.
- The "IEC project" menu opens.
- If the MOVI‑C® CONTROLLER is not available via the network, switch over to "Planning" mode.
- If the MOVI‑C® CONTROLLER is available via the network, carry out a network scan and connect the MOVI‑C® CONTROLLER in the network view with the MOVI‑C® CONTROLLER in the function view.
- Click [Create new IEC project] or [Update IEC project].
- Create new IEC project: The IEC Editor opens and a new IEC project is created. An existing IEC project is overwritten in full.
- Update IEC project: The IEC Editor opens and the IEC project is updated. The update only affects the objects contained in the "SEW_Generated" folder, the task configuration, and the devices by SEW‑EURODRIVE. All other objects remain unaffected (own POU, DUT, tasks, and devices).
INFORMATION

If you have carried out the configuration in MOVISUITE® using the "Startup" mode and the message "Device cannot be reached" appears, proceed as follows:
INFORMATION
